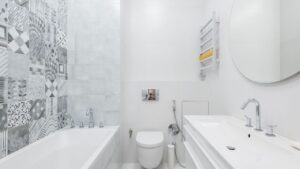
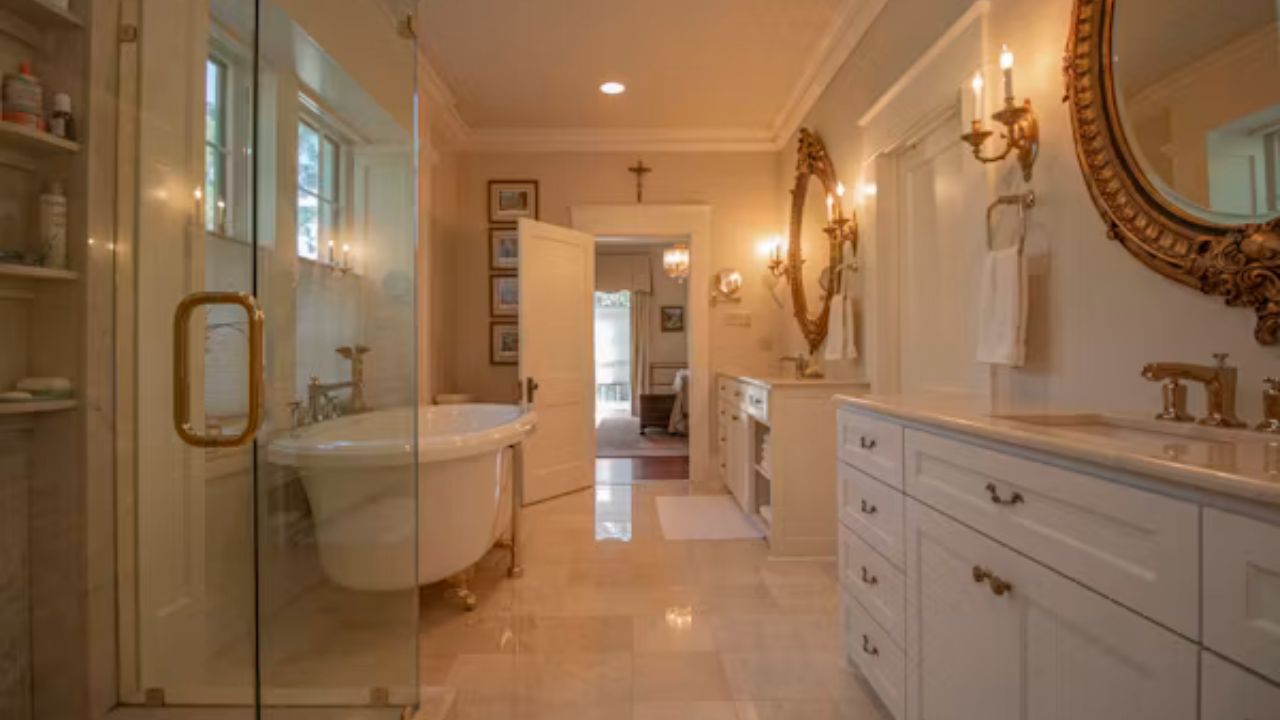
This guide serves three stages of that journey: early feasibility, project planning, and contractor evaluation. It explains the relationship among water supply, drainage, venting, framing, waterproofing, inspection, and finish work. It also gives readers a method for comparing two layouts based on plumbing difficulty rather than appearance alone.
How to Move Plumbing in a Bathroom Without Costly Mistakes
Moving a vanity three feet across a bathroom can be fairly simple. Moving a toilet the same distance may require opening the floor, rerouting a large waste line, protecting structural joists, rebuilding the vent connection, and repairing the room below. On a drawing, both changes look like short moves. Inside the building, they are completely different jobs.
That is the first thing to understand when researching how to move plumbing in bathroom spaces: distance is only one variable. The direction of the floor framing, the location of the main drain stack, available pipe slope, vent access, foundation type, and local plumbing rules usually matter more.
A successful relocation has to do five things at once. It must deliver hot and cold water, carry waste away by gravity, protect every fixture trap with proper venting, preserve the structure, and remain accessible enough to test and maintain. A beautiful layout that compromises any one of those jobs is not a good layout.
This article explains how experienced remodelers assess the work before demolition. It covers toilets, sinks, showers, and tubs; compares slab and framed-floor construction; identifies sensible DIY boundaries; and shows where budgets commonly go wrong. Code references are based on common U.S. practice and examples from the International Plumbing Code (IPC), but the code adopted by your city, county, state, or country always controls.
Quick answer: To move bathroom plumbing, first map the existing supply, drain, and vent lines. Confirm a code-compliant route to the main drain with adequate slope, check joist or slab constraints, obtain required permits, open only the necessary surfaces, reroute and support the pipes, pressure-test and leak-test the system, pass inspection, then close the walls and restore waterproofing. Moving a sink is usually easier than moving a toilet because its drain is smaller.
What “moving bathroom plumbing” actually includes
Plumbing is not a single pipe hidden behind a fixture. Each fixture is part of several connected systems:
- Hot and cold supply piping, usually PEX, copper, or CPVC
- A fixture shutoff or mixing valve
- A trap that holds water and blocks sewer gas
- A fixture drain and larger branch drain
- A vent that stabilizes air pressure in the drainage system
- Supports, protection plates, firestopping, and insulation where required
- Waterproofing around showers, tubs, and other wet areas
That is why bathroom plumbing relocation must be planned as a system. Extending a water line without evaluating the drain accomplishes very little. Likewise, a drain may appear to work during a bucket test yet siphon its trap later if the vent arrangement is wrong.
The work also reaches beyond plumbing. A pipe route can conflict with engineered joists, electrical cable, HVAC ducts, radiant floor tubing, or post-tensioned concrete. Openings through fire-rated walls and floors may need approved firestop materials. Shower relocation can change the waterproofing assembly and floor elevation. A permit may trigger rough-in and final inspections.
Start with feasibility, not demolition
Before removing tile or cutting drywall, document what exists. A simple investigation can prevent an expensive mid-project redesign.
Map the visible fixtures and likely pipe routes
Sketch the room to scale. Mark each toilet, lavatory, tub, shower, exterior wall, interior partition, floor register, and plumbing access panel. Add the proposed fixture locations and measure centerlines rather than estimating from fixture edges.
Next, inspect the spaces above, below, and beside the bathroom. An unfinished basement or crawlspace can reveal joist direction, drain branches, shutoffs, and the main stack. On an upper floor, the ceiling below may provide the least destructive access. Back-to-back bathrooms often share a wet wall, which can make a new layout more efficient—or create congestion inside one narrow stud bay.
Useful tools at this stage include a stud finder with live-wire detection, inspection camera, tape measure, level, flashlight, and the original construction drawings if they are reliable. Do not assume an electronic scanner has identified everything inside a wall. Small exploratory openings made in planned demolition areas provide more dependable evidence.
Identify the main constraints
The central question is not “Can the pipe reach?” It is “Can every pipe reach through a legal, serviceable route without damaging the structure?” Evaluate:
- Drain destination: Where does the fixture branch join the soil stack or building drain?
- Vertical fall: Is there enough elevation to maintain the required grade from the new fixture to that connection?
- Venting: Can the relocated trap connect to an allowed vent arrangement within local limits?
- Structure: Do joists run with or across the proposed drain route? Are they dimensional lumber, I-joists, or floor trusses?
- Access: Can the work be completed from a basement, crawlspace, adjacent room, or ceiling below?
- Foundation: Is the bathroom over wood framing or a concrete slab?
- Hazards: Could demolition disturb asbestos-containing flooring, lead-based coatings, mold, or concealed electrical wiring?
The result should be a rough plumbing route, not merely a new floor plan.
Why drains and vents control the layout
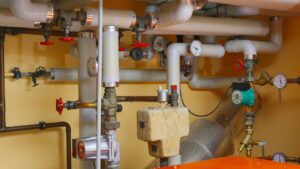
Supply lines are pressurized, relatively small, and often flexible. They can usually travel up, down, and around obstacles within manufacturer and code requirements. Drainage piping is less forgiving because it relies on gravity.
Drain slope consumes vertical space
A horizontal fixture drain must fall toward its destination at the grade required by the locally adopted code. The required slope depends on pipe size and jurisdiction. Even a modest grade consumes height over a long run. If the new shower drain is far from the stack, the pipe may collide with a joist, drop below the ceiling, or require the shower floor to be raised.
This is one reason a long horizontal move can be difficult even when there appears to be open space. The starting elevation, pipe diameter, fittings, and connection elevation all count. A contractor should verify those dimensions with a laser or level before promising that a curbless shower or distant toilet will work.
Decorating Ideas At Home
Decorating Ideas At Home is a home décor and interior design resource offering creative inspiration, practical decorating tips, room makeover ideas, DIY projects, furniture guidance, and stylish solutions for creating beautiful and comfortable living spaces.
ThinkSono
ThinkSono is a technology-focused keyword associated with innovative healthcare solutions, medical technology, and ultrasound-related tools. The term can be used when discussing healthcare innovation, diagnostic technology, medical devices, and digital health solutions.
legalcasenewz
legalcasenewz is a legal information and news-focused keyword covering topics such as legal cases, court decisions, law updates, legal analysis, and important developments in the justice system.
Vents protect trap seals
Every trapped fixture needs a code-approved means of venting. The vent allows air into the drainage system so moving water does not siphon the trap or push sewer gas into the room. Common arrangements include individual vents, common vents, and horizontal wet vents, but their use and sizing are controlled by code.
The International Code Council’s explanation of IPC wet venting notes that bathroom-group fixture drains must connect in prescribed ways so one fixture does not interfere with another. That is a useful reminder: venting is engineered pipe geometry, not an optional vertical tube added wherever convenient.
An air admittance valve, sold by manufacturers such as Studor and Oatey, can admit air at some fixtures where local rules allow it. It does not relieve positive pressure, cannot be buried permanently without required access, and is not accepted everywhere. It should never be used merely to avoid understanding the vent system.
Fittings must follow flow
Drain fittings are directional. A sanitary tee that is acceptable in a vertical drainage connection may be wrong on its back in a horizontal drain. Long-sweep fittings and wyes are used where smoother directional change is required. Cleanouts must remain accessible where the code calls for them.
These details explain why an apparently tidy DIY route can fail inspection or clog repeatedly. The pipe can be watertight and still be badly designed.
Which bathroom fixture is easiest to move?
The usual order, from least to most disruptive, is vanity, tub or shower, then toilet. Site conditions can reverse that order, but it is a helpful starting point.
| Fixture | Typical drain challenge | Supply challenge | Common hidden issue | Relative difficulty |
|---|---|---|---|---|
| Vanity sink | Small branch and trap-arm limits | Hot and cold lines | Vent position and drawer clearance | Low to moderate |
| Tub | Drain and overflow alignment | Mixing valve and spout placement | Access to overflow and trap | Moderate |
| Shower | Low drain elevation and waterproofing | Valve, head, and optional body sprays | Joist conflict and required slope | Moderate to high |
| Toilet | Large waste line and closet bend | One cold line | Stack location, framing, flange height | High |
Do not use this table as a price chart. A vanity on a concrete slab may be harder to move than a toilet over an open basement.
How to move a bathroom sink
A move bathroom sink plumbing project usually involves extending or rerouting two supply lines, relocating the drain stub-out, and providing a compliant vent connection. The visible cabinet can hide a surprising amount of work.
Plan the drain and trap first
Start with the proposed sink drain centerline and the cabinet specifications. The wall drain must leave enough vertical room for the tailpiece and P-trap while clearing drawers, shelves, and disposal containers. Floating vanities are especially demanding because the piping is exposed or confined to a shallow service zone.
The trap arm—the section between the trap and its vented connection—has limits on length, slope, and elevation change. Do not route it down through the floor and create an S-trap. An S-trap can siphon its water seal and is prohibited under modern codes.
If a new vanity sits along the same wall, the plumber may be able to open a narrow section of drywall and extend the branch. Moving it to the opposite wall can require work below the floor and a new vent strategy. For an island-style vanity, the design becomes more specialized and should be approved before framing.
Route supply lines thoughtfully
PEX systems from companies such as Uponor, Viega, and SharkBite can simplify routing, while copper remains common and durable when installed correctly. Material choice should match local code, water chemistry, existing piping, installer competence, and manufacturer instructions.
Place accessible shutoff valves at the fixture. Protect piping from screws and nails with approved steel plates where it passes near framing faces. Avoid burying push-to-connect fittings unless the fitting is specifically listed for concealed use and local rules permit it. Insulate hot-water piping where required or beneficial, and protect any pipe near exterior conditions from freezing.
After the rough-in is assembled, cap the lines and complete the required pressure or leak test before closing the wall. Photograph the open wall with a tape measure visible; the images can prevent a future screw from entering a pipe.
How to relocate a toilet
To relocate toilet plumbing, the plumber must establish a new flange position, route a large drain to an approved branch or stack, preserve grade, vent the fixture correctly, and restore the floor around the opening.
Begin with clearances and flange position
Confirm the code-required clearances around the water closet and compare them with the toilet manufacturer’s rough-in dimension. Many residential toilets use a nominal 12-inch rough-in, but 10-inch and 14-inch models exist. The measurement is generally from the finished wall—not the baseboard—to the center of the flange bolts, subject to the product instructions.
The closet flange must be securely supported and set at the correct elevation relative to the finished floor. If tile thickness changes after rough-in, coordinate the flange height before the floor is closed. Stacking multiple wax rings to compensate for poor elevation is not a sound design strategy.
Protect the framing
A toilet drain is large enough that it cannot simply pass through any joist. Rules for holes and notches differ for solid-sawn lumber, prefabricated I-joists, floor trusses, and engineered beams. Never cut a truss, I-joist flange, laminated beam, or post-tensioned slab based on a generic internet diagram.
When joists run parallel to the new route, the drain may fit inside one bay. When they run perpendicular, options might include connecting from below, creating an engineered framed opening, boxing down a ceiling, changing the layout, or moving the fixture less. Structural changes require the appropriate professional design and approval.
Use offset solutions cautiously
An offset closet flange can correct a small alignment issue where it is legal and compatible with the floor assembly. It is not a substitute for planning a major relocation, and a poorly selected offset can restrict the waste path. A wall-hung toilet with an in-wall carrier from brands such as Geberit or TOTO may free floor space, but it shifts the challenge into the wall and requires suitable framing, drainage, service access, and product-specific installation.
If the toilet move forces several compromises, compare the cost of moving the wall or choosing a different toilet before committing to extensive structural and drain work.
How to move a shower or bathtub drain
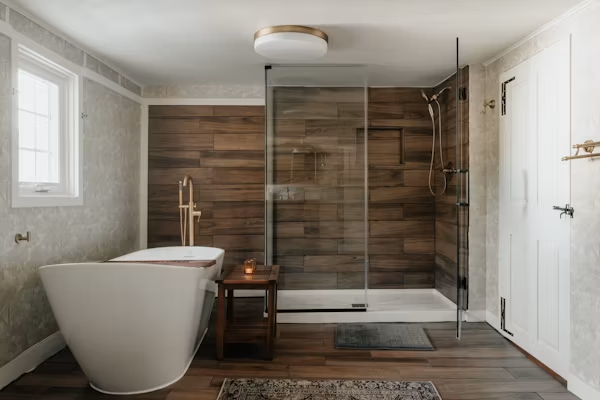
A move shower drain plan is governed by the drain’s low elevation. Unlike a vanity drain, it cannot be raised far without changing the shower base or creating a step.
Coordinate the drain with the waterproofing system
Select the waterproofing method before rough plumbing. A traditional clamping-ring drain with a mortar-bed liner, a bonded-flange drain used with systems such as Schluter-KERDI, and a linear drain all require different elevations and connections. Mixing components from incompatible systems can create a failure that remains hidden until water reaches the room below.
For a curbless shower, the entire assembly—joist depth, subfloor recess, drain body, slope to drain, waterproofing, tile thickness, and bathroom floor transition—must be drawn in section. The visual floor plan alone is not enough.
Account for shower flow
One showerhead and a high-output multi-outlet system are not the same design load. Body sprays, rain heads, and hand showers can raise both supply demand and drainage demand. Confirm the valve’s flow, available water pressure, hot-water capacity, drain sizing, and local limits before buying trim.
Position the valve where it can be operated without standing under cold water. Follow the mixing-valve manufacturer’s depth range precisely; a valve set too deep or too shallow may not accept the finished trim.
Preserve service access
Tub waste-and-overflow assemblies and pumps for jetted tubs need service access. Place an access panel in a closet, removable tub apron, or adjacent wall when required. Do not seal a mechanical joint behind tile merely because it passed an initial test.
Moving plumbing on a concrete slab versus a framed floor
The construction below the bathroom has a major effect on method, risk, and cost.
| Condition | Typical work | Main risk | Cost-control opportunity |
| Open basement below | Work from below with limited bathroom demolition | Ceiling repair and congested framing | Keep fixtures within favorable joist bays |
| Crawlspace | Route below floor if access and clearances permit | Moisture, insulation, pests, limited working room | Inspect and plan supports before demolition |
| Finished room below | Open selected ceiling areas | Finish matching and occupant disruption | Use measured access openings instead of broad demolition |
| Concrete slab | Scan, saw-cut, excavate, reroute, test, backfill, patch | Reinforcement, post-tension cables, settlement, dust | Keep drains near existing trenches or walls |
| Post-tensioned slab | Specialist scanning and engineered planning | Severe structural and safety hazard if a tendon is cut | Redesign to avoid cutting whenever feasible |
What slab relocation involves
For moving plumbing on concrete slab, a qualified team may locate utilities and reinforcement, isolate dust, saw-cut a trench, remove concrete, excavate around the existing drainage, install and test new piping, place suitable backfill, patch the slab, and rebuild the finish assembly. The exact method depends on the slab design and jurisdiction.
Concrete cutting should never begin until the slab has been evaluated for embedded electrical lines, hydronic tubing, reinforcement, and post-tensioning. Ground-penetrating radar or other professional scanning may be appropriate. A post-tension cable can be dangerous and structurally significant.
Slab work is also hard to reverse. Before concrete is replaced, verify pipe support, bedding, slope, fitting direction, test results, inspection approval, and exact fixture centerlines. Take photographs and measurements. This is the point at which a ten-minute documentation check can prevent days of rework.
Permits, inspections, and code questions
A bathroom remodel plumbing permit is commonly required when drains, vents, or concealed supply piping are altered. Cosmetic fixture replacement in the same location may be treated differently. Requirements vary widely, so contact the local authority having jurisdiction before work begins.
Ask the building department:
- Which plumbing or building permits apply?
- Must a licensed plumber perform or supervise the work?
- Which code edition and local amendments are adopted?
- Are drawings or riser diagrams required?
- Are separate structural, electrical, or mechanical permits needed?
- What rough-in, pressure-test, shower-pan, and final inspections are required?
- May walls be closed before each inspection?
The International Plumbing Code and Uniform Plumbing Code are model codes, not universal instructions. A jurisdiction may adopt one, amend it, or use another framework. Online code excerpts are helpful for vocabulary, but they do not replace the locally adopted text or an inspector’s approved interpretation.
Permits are not merely paperwork. A rough inspection lets the inspector see pipe size, support, grade, venting, protection, test setup, and approved materials before concealment. That timing protects the homeowner because many defects become costly to prove after tile and cabinets are installed.
A practical step-by-step relocation process
The exact sequence changes by project, but this workflow keeps design decisions ahead of irreversible work.
1. Freeze the functional layout
Confirm fixture dimensions, door swings, storage, clearances, lighting, electrical zones, accessibility goals, and cleaning space. Use the actual product specification sheets. “Standard size” is too vague for rough-in work.
2. Investigate the building
Locate shutoffs, the water service, branch drains, stack, vents, framing direction, slab type, electrical circuits, ductwork, and rooms affected by access. If the home is older, arrange appropriate testing before disturbing suspect flooring, adhesive, insulation, coatings, or wallboard.
3. Draw the plumbing route
Create a dimensioned plan and a vertical section. Show pipe sizes, fittings, grade, vent connections, cleanouts, valves, and fixture centerlines. For complex work, include an isometric or riser diagram.
4. Compare at least two layouts
Price the preferred plan and a plumbing-efficient alternative. A vanity moved 18 inches less or a toilet rotated rather than relocated may save structural work, ceiling repair, and a new vent route without sacrificing function.
5. Obtain approvals and qualified bids
Submit permit documents as required. Give each bidder the same scope, product list, and known site conditions. Ask who handles demolition, scanning, engineering, inspection scheduling, waterproofing, firestopping, and finish repair.
6. Isolate utilities and protect the site
Shut off water, verify pressure is relieved, and protect adjacent rooms. Turn off and verify affected electrical circuits where demolition may expose wiring. Establish dust control and a debris route. Occupied-home remodeling needs a plan for temporary bathroom use.
7. Open targeted access areas
Expose enough of the system to verify assumptions. Stop if the actual framing, pipe route, slab, or hazardous material differs from the plan. Updating the design now is cheaper than improvising around a concealed conflict.
8. Complete the rough plumbing
Install the drainage, venting, and supply systems with approved materials, fittings, joining methods, support, protection, and firestopping. Coordinate valve depths and drain elevations with the finished wall and floor assemblies.
9. Test before concealment
Perform the test required by local code and the inspector. Check supply joints under pressure, test drainage and vent piping as required, and complete a shower-pan flood test when applicable. Do not depend on a quick visual check.
10. Inspect, document, and close
Obtain approval before covering the work. Photograph each wall and floor with measurements. Then complete insulation, air sealing, subfloor repair, wallboard, waterproofing, tile, cabinets, fixtures, trim, and final inspection.
11. Commission the finished bathroom
Run every fixture separately and together. Check hot and cold orientation, valve operation, toilet stability, drainage speed, trap seals, leaks, caulk joints, shower spray containment, and accessible shutoffs. Recheck below the bathroom after several real-use cycles.
Can you move bathroom plumbing yourself?
Some homeowners can perform limited demolition, fixture removal, painting, or cabinet work. Concealed drainage, venting, structural alterations, slab cutting, shower waterproofing, and permitted connections carry much higher consequences.
Use this decision test. DIY work is a poor choice if any of these apply:
- You cannot positively identify the drain and vent route.
- A joist, beam, truss, or slab must be cut or altered.
- The project involves a wall-hung toilet, curbless shower, or multi-outlet shower.
- The building is old enough to present asbestos or lead concerns.
- Local law requires a licensed trade contractor.
- You cannot conduct the prescribed test or leave work open for inspection.
- A leak would damage an occupied unit or property below.
A common compromise is owner-managed demolition and finish work with licensed plumbing for the rough-in and connection. Confirm that arrangement before demolition because many contractors will not accept responsibility for an unknown or partially completed installation.
Cost: what actually drives the quote?
Anyone searching cost to move bathroom plumbing will find broad price ranges. Those numbers are difficult to use because they often mix fixture replacement, full relocation, and complete remodeling. A more reliable estimate separates the work into cost drivers.
| Cost driver | Lower-impact condition | Higher-impact condition |
| Access | Open basement or planned wall opening | Finished ceiling, masonry, or occupied unit below |
| Drain distance | Same bay and near stack | Across joists or far from stack |
| Foundation | Framed floor | Reinforced or post-tensioned slab |
| Venting | Existing approved vent nearby | New vent route through multiple floors or roof |
| Structure | No framing alteration | Engineered opening or beam modification |
| Finish | Paint-grade drywall | Waterproofing, stone, specialty tile, cabinetry |
| Approvals | Simple trade permit | Drawings, engineering, multiple inspections |
| Site | Empty detached home | Condo with association and access restrictions |
Request an itemized quote that distinguishes plumbing labor and material from demolition, concrete, engineering, permits, waterproofing, tile, drywall, painting, and fixture installation. Ask what is excluded. The cheapest plumbing proposal may omit the most expensive repair work.
Build a sensible contingency
Remodels expose conditions that could not be confirmed from the surface: corroded galvanized pipe, undersized branches, damaged subfloor, unvented fixtures, abandoned lines, or framing cuts from earlier work. A contingency is not permission for vague billing; it is a reserved amount tied to documented unknowns.
Use allowances only for items that truly remain undecided. Fixed specifications for valves, drains, carriers, and waterproofing reduce change orders because rough-in dimensions are known before the walls open.
A mini case study: two layouts, very different costs
Imagine a second-floor bathroom with a toilet beside the main stack, a vanity on the same wet wall, and a tub spanning the exterior wall. The desired plan puts a freestanding tub where the toilet sits, moves the toilet six feet across the room, and shifts the vanity to the opposite wall.
Layout A looks balanced, but the toilet drain must cross several joists. The new vanity needs a vent solution, and the tub filler requires routing through an exterior-wall zone. Work also affects the finished dining-room ceiling below.
Layout B rotates the toilet near the existing stack, moves the vanity along the wet wall, and places the tub where its drain can use an existing joist bay. The room still feels new, yet the large drain stays near its original branch, the vent system changes less, and ceiling openings are smaller.
The lesson is not that fixtures should never move. It is that the highest-value design often moves them strategically. Preserve the hardest infrastructure—the large drain and viable vent path—then spend design freedom on cabinets, lighting, finishes, storage, and the fixtures whose smaller connections are easier to route.
Common mistakes that create expensive failures
Designing from the finished surface only
A Pinterest-style plan shows what the bathroom looks like, not whether the drain can fall through the framing. Every relocation should be checked in plan and section.
Treating venting as an afterthought
Gurgling, slow drainage, trap siphonage, and sewer odors can follow an improper vent layout. Venting must be designed with the drain, not added after it.
Cutting framing to make the pipe fit
An unapproved notch can weaken the floor and create bounce, cracked tile, or structural damage. Engineered wood products have product-specific restrictions. Get the right design rather than forcing the pipe through.
Closing the wall before testing and inspection
Tile is an expensive leak detector. Test the system while every joint and connection is visible, complete required inspections, and record the installation with photographs.
Ignoring finished dimensions
Rough plumbing must anticipate backer board, waterproofing, tile, flooring, cabinetry, and trim. A correctly placed valve relative to a bare stud can still be wrong relative to the finished wall.
Buying fixtures before checking compatibility
Imported fixtures, unusual wall-hung bowls, linear drains, and freestanding tub fillers may require proprietary parts, specific pressure, nonstandard rough-ins, or certifications that do not match local requirements. Obtain submittals first.
Forgetting maintenance access
Concealed valves, cleanouts, air admittance valves, pumps, and mechanical joints may need access. A discreet panel is better than emergency tile demolition.
Safety and health concerns during bathroom demolition
Old bathrooms can contain more than old pipe. Depending on building age and location, flooring, mastics, cement products, insulation, textured coatings, or wall materials may contain asbestos. Painted surfaces may contain lead. Long-term leaks can support mold and decay.
Do not sand, grind, cut, or dry-sweep suspect materials. Arrange testing and qualified abatement where required. OSHA guidance recognizes that respirator selection and remediation precautions change when contaminants such as asbestos or lead are present. For a homeowner, the practical rule is simple: identify the material before creating dust.
Plumbing work also introduces ordinary hazards—sharp metal, contaminated drain water, open floors, electrical wiring, silica dust from concrete, soldering heat, and heavy fixtures. Use task-appropriate controls and personal protective equipment, and keep children and occupants away from the work zone.
Efficiency upgrades worth considering while the walls are open
Relocation creates a rare chance to improve performance, not just appearance.
Shorten hot-water wait time
Long pipe runs waste water while users wait for hot water. Where possible, keep fixtures close to the water-heater distribution path, reduce unnecessary pipe volume, insulate appropriate hot-water lines, or assess a demand-controlled recirculation design with a qualified professional. A continuously operating recirculation system can waste energy if poorly designed.
Choose efficient fixtures
EPA WaterSense-labeled bathroom products meet efficiency and performance criteria. The EPA states that a bathroom fitted with WaterSense fixtures can save a household nearly 10,000 gallons of water per year, though actual savings depend on the replaced fixtures and household use. Efficiency is most useful when paired with reliable shutoffs, sound pipe sizing, and a leak-free installation.
Add leak detection where risk is high
For an upstairs bathroom, consider an accessible automatic shutoff or leak-detection system that fits the plumbing design and homeowner’s maintenance habits. Sensors do not replace correct waterproofing or tested joints, but they can reduce the time between a leak starting and someone noticing it.
Improve access and aging-in-place readiness
Blocking for future grab bars, a handheld shower outlet, a curbless or low-threshold entry, and sensible toilet clearances is far easier before walls close. Accessibility planning may change valve position, drain design, floor slope, and framing, so include it at the beginning.
How to hire and compare plumbing contractors
For hiring a licensed plumber, verify the license where licensing exists, insurance, permit responsibility, and recent experience with similar remodels. A plumber who mainly replaces water heaters may not be the best fit for a complex second-floor wet-room relocation.
Ask each bidder the same questions:
- What route will the new drain take, and how was available fall confirmed?
- How will each fixture be vented?
- Will any framing or concrete be cut? Who approves that work?
- Which walls or ceilings will be opened, and who repairs them?
- What tests and inspections are included?
- Are fixture setting, trim, waterproofing, firestopping, and final connections included?
- Which products or specifications must be selected before rough-in?
- How are concealed conditions documented and priced?
A strong contractor should be able to explain the route in plain language. Be wary of confident pricing based only on a photo when the drain, framing, or slab has not been investigated.
Expert checklist before you approve the plan
Use this concise bathroom plumbing relocation checklist:
- Fixture model numbers and rough-in sheets are confirmed.
- Finished-wall and finished-floor dimensions are included.
- Drain sizes, route, grade, and connection points are shown.
- Every trap has an approved vent strategy.
- Joist, truss, beam, slab, and reinforcement constraints are known.
- Required clearances and accessibility goals are met.
- Valve depths and service access are coordinated.
- Waterproofing and drain components form one compatible system.
- Permit, inspection, and testing responsibilities are assigned.
- Demolition hazards have been assessed.
- Finish repair and the room below are included in scope.
- Photographs will be taken before concealment.
- A documented contingency exists for genuine unknowns.
If several boxes remain unchecked, the project is not ready for demolition.
Frequently asked questions
How hard is it to move plumbing in a bathroom?
It ranges from straightforward to highly invasive. Extending a vanity’s lines within an open wall may be modest work. Moving a toilet across joists or relocating a shower drain in a post-tensioned slab can require a plumber, engineer, concrete specialist, permits, and extensive finish repairs.
Can you move bathroom plumbing without opening the floor?
Sometimes. Supply lines and a vanity drain may be rerouted through a wall or ceiling below. A toilet or low shower drain often needs underfloor access. Alternatives include a raised platform, a wall-hung system, or a revised layout, but each must meet local code and manufacturer requirements.
How far can bathroom plumbing be moved?
There is no universal maximum distance. The practical limit depends on drain size, available elevation, required slope, vent arrangement, framing, connection location, and local code. Longer routes also increase material, labor, access, and maintenance concerns.
Is moving a toilet a few inches easier than moving it across the room?
Usually, but not always. A small shift may use an approved offset solution or a short branch alteration. If even a two-inch change conflicts with a joist or flange opening, it can still require structural or floor work. Confirm conditions before ordering the toilet.
Can a toilet and sink share a vent?
They can share certain vent arrangements, including code-compliant bathroom-group wet venting, where the adopted code permits and all sizing and connection rules are satisfied. It is not enough to connect both drains to any convenient pipe. Have the arrangement reviewed locally.
Do I need a permit to move a bathroom sink?
Many jurisdictions require a permit when concealed drains, vents, or water lines are relocated. A simple faucet or fixture replacement in the same location may be exempt. Ask the authority having jurisdiction; do not rely on a contractor’s general statement about another city.
Can PEX be used when moving bathroom water lines?
PEX is allowed in many locations when the selected system is listed, installed under its instructions, protected from damage, and accepted by local code. Connection methods, support spacing, bend radius, UV exposure, and concealed fitting rules matter.
Why does my relocated sink gurgle?
Possible causes include poor venting, a partial blockage, excessive trap-arm length, incorrect slope, or an improper fitting arrangement. Gurgling is a symptom, not a diagnosis. Have the drain and vent layout inspected rather than treating it only with drain cleaner.
Should plumbing be moved before or after framing?
The route should be designed before framing changes, then coordinated during rough framing and rough plumbing. Structural members cannot be improvised around the pipe. Final fixture setting occurs after the relevant finished surfaces are ready.
How long does bathroom plumbing relocation take?
The rough plumbing itself may take a day or several days, but total duration depends on investigation, permits, demolition, concrete or framing work, inspections, waterproofing, curing times, and finish repairs. A full remodel can span weeks even when pipe installation is a small portion.
What is the safest way to control the budget?
Keep the toilet and main drain near their current locations, select fixtures early, investigate access before bidding, compare a plumbing-efficient layout, use a written scope, and reserve contingency for documented unknowns. These choices control more cost than shopping for cheaper pipe.
Final perspective
The smartest answer to how to move plumbing in bathroom projects begins below the finished floor. Start with the drain and vent route, prove the elevations, respect the structure, and build the room around verified constraints. That approach may support the layout you wanted—or reveal a small design change that saves a large amount of demolition.
Good planning is not about refusing ambitious remodels. It is about spending money on changes that improve the room rather than on avoidable repairs behind it. When supply, drainage, venting, structure, waterproofing, and inspection are coordinated before demolition, the finished bathroom is easier to build, safer to use, and far less likely to hide a costly surprise.